
When a student stops lessons, work through these steps in order. Settle the past first, then stop the future.
1. Settle lessons that did not happen
Use Make it right for past lessons the student paid for but did not have.
- Select Contacts in the sidebar and open the student.
- Select Settle lessons… under Make it right.
- For each lesson, choose Leave, Makeup or Refund.
- Enter a Reason (optional), for example “Student left mid-term”.
- Select Settle.
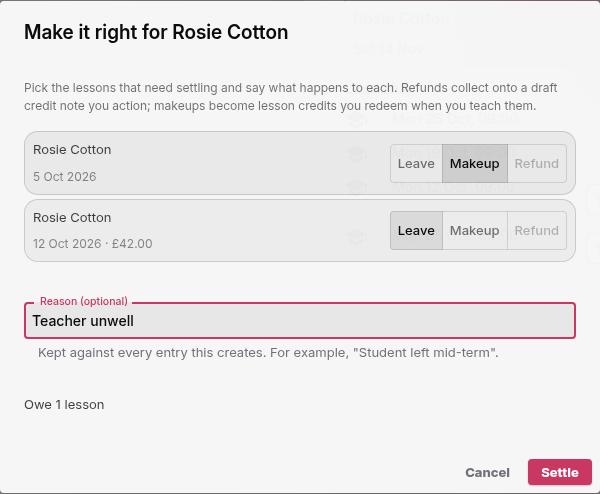
If the student is leaving, a makeup may not be possible. Choose Refund for lessons on a paid invoice. For details, see How to issue a refund, credit note, or lesson credit.
2. Stop future lessons
- Select Timetable in the sidebar.
- Go to the first lesson the student will not have.
- Select the lesson.
- Select Cancel selected event (the bin icon) in the Selected Event panel.
- Select This and future events.
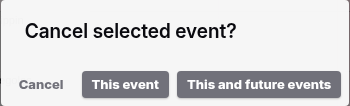
The repeating lesson now ends before the lesson you selected. That lesson and every later one are removed from your timetable.
If the selected lesson is already on an invoice, the dialog also asks What happens to the money?. Your choice applies to that one lesson only. Settle any other invoiced lessons with Make it right in step 1.
3. Close off invoices
Open the student’s contact page and check Invoices.
| Invoice status | What to do |
|---|---|
| Draft | Select Cancel invoice if you will not send it. The invoice changes to Cancelled. Nothing is sent. |
| Open or Overdue | Wait for payment, or select Mark as Paid when you receive the money another way. To stop asking for the money, select Cancel invoice. The invoice changes to Written Off and the payer gets a cancellation email. |
| Paid | Nothing to do, unless you owe money back. Then use Refund. |
4. Clear lessons owed and credit notes
On the student’s contact page:
- Lessons owed: if you cannot teach the lessons you owe, select Remove next to each credit, or refund the money instead.
- Credit notes: open any credit note with the status Draft and select Action & Send. Return the money for any credit note with the status Refund Owed, then select Record Refund.
5. Remove portal access
Portal links let a family see their lessons and invoices. In the Contact portal section of the contact page:
- Select Revoke next to each link.
The link stops working at once. Links also stop working on their own after 90 days.
The Contact portal section is available to founding members with early features turned on.
6. Stop the Direct Debit
The Direct Debit section on the contact page shows the payer’s Direct Debit and its status. You cannot cancel a Direct Debit from Soniq Studio.
To stop it, cancel it in your GoCardless dashboard. The payer can also cancel it with their bank. When GoCardless reports the cancellation, the status in Soniq Studio changes to Cancelled and you get an email.
What stays
The student’s contact, past lessons, invoices and credit notes stay in Soniq Studio. Your records stay complete for your accounts.